Building a NestJS CRUD App: Part 2
This is the final post in a two-part series where we will explore when, how, and why we should use NestJS. This post covers how to add authentication and authorization to our backend.
The last time I worked with NestJS, I built a todo simple application. The goal of this project was to demonstrate how to use NestJS to create a CRUD app that connected to a database using PrimaJS. I had a lot of fun learning about these technologies, but the resulting application fell short of real-world expectations.
The problem with our todo application is that it only works for a single user. In this tutorial, we will focus on updating our application so that distinct users can create and interact with their own todos. To make this a reality, we will need to update our application requirements to introduce the concept of a User, which will need to log in (authenticate) to the application and is only allowed to interact with its own todos (must be authorized to perform CRUD operations on the object).
At a high level, our solution will involve the following:
- Create a new Prisma
Usermodel and modify our existingTodomodel to reference its owner - Create an authentication system that does the following:
- Verifies the user's credentials on log in
- Provides the user with an access token on successful log in
- Verifies the access token on all subsequent requests
- Create an authorization system that verifies a user's ownership over the todo they are interacting with
All code for this tutorial can be found in the following repository: https://github.com/taylorreis/nestjs-todo-server/tree/tr-add-auth
Prerequisites
This post makes use of the same PostgreSQL database and NestJS app as before - make sure those are up and running before we get started. For more information on how we did this, you can refer to the last post in this series.
React Client
As with the last post, we will use the same React Client for testing. For this post, I have created a new log in form and updated the client to work with the changes we will make to the backend. The updated version of the client is on a branch called tr-add-auth, which can be accessed here. Feel free to pull that code down and build it before we get started.
Updating our PostgreSQL Database and Prisma Schemas
The first step in making our application user-scoped is to update our database models. We will add a User entity which has a one-to-many relationship with the Todo entity, meaning a user can be associated with many todos. We'll do this by updating our Prisma schema and leveraging Prisma's CLI to generate database migrations and models for us.
To keep things simple, our User model will include an autogenerated ID, a unique username, and a password. We can add this to our Prisma schema, and also link it to the existing Todo model with the following updates to schema.prisma:
model Todo {id Int @id @default(autoincrement())createdAt DateTime @default(now())updatedAt DateTime @updatedAtdescription Stringuser User @relation(fields: [userId], references: [id])userId Int}model User {id Int @id @default(autoincrement())username String @uniquepassword Stringtodos Todo[]}
We can see from these changes that our Todo model has two new fields (user and userId) that we use to reference a User. The user field describes the relation between our data models and the userId field is the database column that will be created to link a Todo to a User. On the other side, our User model has a todos field that provides an array of Todo entities that are associated with it. You'll also see on the User model that we've set the Prisma @unique attribute on the username field to enforce the uniqueness constraint. You can find more information on Prisma data models and the various attributes that you can use in your models here.
With these changes in place, we can generate and run our database migrations using the Prisma CLI. Before we do this, let's check to see if we have any existing Todo records in the database. If any exist, we will need to delete them since we are adding a new non-nullable column (userId) to our table that has no default backfill value. We can accomplish this by running the following commands to look up and delete todos in the psql shell:
todo-app-db=# SELECT * FROM "Todo";
 id |        createdAt        |        updatedAt        |      description
----+-------------------------+-------------------------+-----------------------
  6 | 2021-02-09 15:12:20.359 | 2021-02-09 15:12:20.359 | This is another TODO!
(1 row)

todo-app-db=# DELETE FROM "Todo" WHERE id = 6;
DELETE 1
With any lingering todos deleted, we can shift gears and run the following command to generate and run a new migration with our changes against the database:
> npx prisma migrate dev --preview-featureWhen we run this command, it will ask us to give our migration a name, which can be anything. After verifying that the migration ran and exited successfully, we can check that the database was updated correctly. Run the following commands in your psql shell:
todo-app-db-1-# \dt
               List of relations
 Schema |        Name        | Type  |  Owner
--------+--------------------+-------+----------
 public | Todo               | table | postgres
 public | User               | table | postgres
 public | _prisma_migrations | table | postgres
(3 rows)

todo-app-db-1=# \d "Todo";
                                           Table "public.Todo"
   Column    |              Type              | Collation | Nullable |              Default
-------------+--------------------------------+-----------+----------+------------------------------------
 id          | integer                        |           | not null | nextval('"Todo_id_seq"'::regclass)
 createdAt   | timestamp(3) without time zone |           | not null | CURRENT_TIMESTAMP
 updatedAt   | timestamp(3) without time zone |           | not null |
 description | text                           |           | not null |
 userId      | integer                        |           | not null |
Indexes:
    "Todo_pkey" PRIMARY KEY, btree (id)
Foreign-key constraints:
    "Todo_userId_fkey" FOREIGN KEY ("userId") REFERENCES "User"(id) ON UPDATE CASCADE ON DELETE CASCADE

todo-app-db-1-# \d "User";
                              Table "public.User"
  Column  |  Type   | Collation | Nullable |              Default
----------+---------+-----------+----------+------------------------------------
 id       | integer |           | not null | nextval('"User_id_seq"'::regclass)
 username | text    |           | not null |
 password | text    |           | not null |
Indexes:
    "User_pkey" PRIMARY KEY, btree (id)
    "User.username_unique" UNIQUE, btree (username)
Referenced by:
    TABLE ""Todo"" CONSTRAINT "Todo_userId_fkey" FOREIGN KEY ("userId") REFERENCES "User"(id) ON UPDATE CASCADE ON DELETE CASCADE
The important parts of these results are the Foreign-key constraint that was added to Todo, the new userId column in Todo, and the new User table. Foreign-keys are useful because they tie two tables together using one or more columns and enforce the relationship when inserting new records. In this case, we linked the User and Todo tables with the User.id and Todo.userId columns.
The Prisma migrate command also updated our Typescript Prisma client package and models. In the next section, we will take a look at how we will leverage the new User model.
Working with Users and Credentials
To perform authentication, we need a way of looking up users in the database. In this section we will build a new User module that exposes a new service provider that queries the database for users. We will also explore how to store user credentials in the database and manually create and insert a couple users for testing purposes.
Creating a User Module
Our User module will be very simple and only needs to expose a service method to find a user. Let's use the NestJS CLI tools to build a new module and service:
> nest g module users && nest g service usersSince we want to use this module to access User records in the database, we'll need to make sure to import our PrismaModule from part one in users/users.module.ts:
import { Module } from '@nestjs/common';import { PrismaModule } from '../prisma/prisma.module'; // pull in the moduleimport { UsersService } from './users.service';@Module({providers: [UsersService],exports: [UsersService], // make sure to export this service for laterimports: [PrismaModule], // list it as an import so that we can consume it})export class UsersModule {}
The last thing we'll need to to is modify UsersService by adding a method to find a User by querying the database with Prisma:
import { Injectable } from '@nestjs/common';import { Prisma } from '@prisma/client';import { PrismaService } from '../prisma/prisma.service';@Injectable()export class UsersService {constructor(private readonly prisma: PrismaService) {}findOne(findUniqueUserArgs: Prisma.UserWhereUniqueInput) {return this.prisma.user.findUnique({where: findUniqueUserArgs,});}}
Creating a User
Now that we have a way to look up users, we'll need actual users in the database. To do this, we are going to manually insert our records by running queries using psql directly. A better longterm option would be to create a User controller alongside a create service method so that you can generate new users programmatically.
Hashing Credentials
Before we create a User, we need to consider how we should store passwords in the database. It's never a good idea to store passwords in plain-text; we should always salt and hash them so that we don't provide access to their true value. Note that hashing is different than encryption. Hashing is a one-way function, meaning that we pass data into it and get a hash as output. We can't get back to the original data using the hash without guessing (a brute-force attack). When we add salt (some kind of additional secret text) before hashing, we make it even more difficult to guess the original value. Encryption on the other hand, is a two-way function that produces a ciphertext from the input data which can be decrypted, typically using some kind of key system.
bcrypt is a hashing library that scales well with processing capabilities. Essentially, as computers get faster, bcrypt can adapt by getting slower (adding more rounds of hashing) to make more mature hashes. Additionally, bcrypt has salting built in, which makes our lives easier. Let's install the library and its types into our project using the following npm commands:
> npm i --save bcrypt && npm i --save-dev @types/bcryptNext, open a terminal in your project directory and start Node.js (this can be done by typing node). Go ahead and import bcrypt with the following command: const bcrypt = require('bcrypt');. Then, hash a password of your choosing with bcrypt's hash command: bcrypt.hash('password', 10).then(hashed => console.log(hashed));. Your output should look something like the following:
> node
Welcome to Node.js v14.15.0.
Type ".help" for more information.
> const bcrypt = require('bcrypt');
undefined
> bcrypt.hash('password', 10).then(hashed => console.log(hashed));
Promise { <pending> }
> $2b$10$WsfQsDnxDXgCJCdrF8Nj.uPAoc41M5w20px/bBhpFKtaMLcmg8v6G
Manually Seeding a User in the Database
Using the hashed password from above, open up your psql shell again and insert a new user into the database like so:
todo-app-db=# INSERT INTO "User" (username, password) VALUES ('user', '$2b$10$WsfQsDnxDXgCJCdrF8Nj.uPAoc41M5w20px/bBhpFKtaMLcmg8v6G');
INSERT 0 1
Congrats, we now officially have our first user! In the next section, will figure out how to authenticate this user.
Adding Authentication
Authentication allows us to verify who is using our application. For our purposes, we will need two separate features to support authentication: a login endpoint that will be responsible for verifying a user's credentials and generating a token that can be used for future requests, and a function that will verify the token and use it to look up the user. We could pass our token through cookies or bearer tokens in an Authorization header. Both approaches have pros and cons to consider (checkout this StackOverflow post for context), but this solution will use the latter.
A common format for bearer tokens is the JSON Web Token (JWT) standard. JWTs are generated after verifying the user's credentials during login and typically provide information about that user's identity, such as their ID and roles (what are they allowed to do?). JWTs can be signed by the server using a secret, such as a private/ public key or other text that only the server has access to, and can also be encrypted, both of which prevent modification of the token contents. The advantage of signing tokens is that we can verify the signature of incoming tokens in order to tell if they have been modified or not.
Building an Auth module
Before we can jump into JWTs, we'll need to create a new module, service, and controller to handle our auth code:
> nest g module auth && nest g service auth && nest g controller authRemember that we'll need to look up users. Open up auth.module.ts and import UsersModule so that we can access the service provider in this module:
import { Module } from '@nestjs/common';import { UsersModule } from '../users/users.module';import { AuthController } from './auth.controller';import { AuthService } from './auth.service';@Module({imports: [UsersModule, // make sure to import the Users module],providers: [AuthService],controllers: [AuthController],})export class AuthModule {}
Next, open up auth.service.ts. This is where the bulk of our work will be for the next few sections. We want to do a couple things:
- Create a function to validate a user, using our
UsersServiceto perform the database look up - Create a function that generates and signs a JWT for a verified user
Our first task will be fairly straight-forward. We will want to create an AuthService method called validateUser that will take a username and password as arguments, ask UsersService to perform a look up for that user, and then if a user is found, use bcrypt to compare the hashed password to the plain-text one that was passed in during login. If a user cannot be found using the username, or the password comparison fails, we know the credentials are not correct and we will return null. Otherwise, we will return the user, less the password, back to the caller:
import { Injectable } from '@nestjs/common';import { User } from '@prisma/client';import * as bcrypt from 'bcrypt';import { UsersService } from '../users/users.service';@Injectable()export class AuthService {constructor(private usersService: UsersService, // inject the UsersService for use in this service) {}async validateUser(username: string,password: string,): Promise<Omit<User, 'password'> | null> {const user = await this.usersService.findOne({ username });if (user?.password == null) {return null;}const isPasswordMatch = await bcrypt.compare(password, user.password);if (isPasswordMatch) {return {id: user.id,username: user.username,};}return null;}}
Notice how simple this logic is. There's nothing magic going on, which is the beauty of building out our foundation piece by piece like this. Our next step will be to connect this logic to Passport, which will provide a really nice abstraction for dealing with authentication.
Verify User Credentials with Passport
Passport is a powerful library that provides solutions for common authentication scenarios. A solution for a specific type of authentication, such as a local database check, or OAuth, is known as a strategy. In this post, we will use two strategies: a local strategy for verifying a user's credentials against our database records, and a JWT strategy for verifying incoming request tokens.
All Passport strategies take a verify callback that we must implement. In the local strategy solution, all we have to do is call into the validateUser method we just implemented.
Passport Setup
Adding Passport to our project is straight-forward. NestJS has service providers that make working with Passport really easy. To get up and running, we'll need to install the following modules:
> npm i --save passport passport-local @nestjs/passport && npm i --save-dev @types/passport-localThese dependencies will allow us to implement a local strategy by extending NestJS' PassportStrategy module. A NestJS PassportStrategy requires a validate function, which is called internally by the Passport verify callback. We can easily build a new service provider that implements its own validate function and exposes a consumable strategy.
Creating a Local Strategy
To build our local strategy, run the following command to create a new class in our auth module:
> nest g class local.strategy authOpen up the file we just created (auth/local.strategy.ts) and add the following code:
import { Strategy } from 'passport-local';import { PassportStrategy } from '@nestjs/passport';import { Injectable, UnauthorizedException } from '@nestjs/common';import { AuthService } from './auth.service';@Injectable()export class LocalStrategy extends PassportStrategy(Strategy) {constructor(private authService: AuthService) {super();}async validate(username: string, password: string): Promise<any> {const user = await this.authService.validateUser(username, password);if (user == null) {throw new UnauthorizedException();}return user;}}
Notice how NestJS' PassportStategy takes an argument to specify which Passport strategy we want to use (passport-local). This configuration is what tells Passport that we can expect a username and password when validate is executed. We implement the validate method by calling into the validateUser method exposed by the injected AuthService from earlier. If the result is null, then we can return the appropriate auth error, which NestJS will translate to a 401 HTTP status code. We return the user if the check was successful, allowing us to create a JWT with its data.
Go ahead and update auth/auth.module.ts to import the PassportModule and list our LocalStrategy as a service provider:
import { Module } from '@nestjs/common';import { PassportModule } from '@nestjs/passport';import { UsersModule } from '../users/users.module';import { AuthService } from './auth.service';import { AuthController } from './auth.controller';import { LocalStrategy } from './local-strategy';@Module({imports: [UsersModule,PassportModule, // import NestJS' passport module],providers: [AuthService,LocalStrategy, // add our local strategy to our list of providers],controllers: [AuthController],})export class AuthModule {}
Now that we've implemented a LocalStrategy, let's see how we can use it to protect our routes.
NestJS Guards
NestJS provides a really convenient way to add access-control to routes, known as Guards. Guards implement a single canActivate method, which tells the framework whether or not the request should go through to the route handler. Guards are super easy to create, especially with Passport strategies. We can build a new guard by running the following command:
> nest g guard local-auth authOpen the file that was created and simply extend NestJS' AuthGuard Passport service provider while specifying which strategy we'd like to use:
import { Injectable } from '@nestjs/common';import { AuthGuard } from '@nestjs/passport';@Injectable()export class LocalAuthGuard extends AuthGuard('local') {}
Finally, create a login route in auth/auth.controller.ts and add our Guard to it by importing and using the NestJS provided UseGuards decorator:
import { Controller, Request, Response, Post, UseGuards } from '@nestjs/common';import { AuthService } from './auth.service';import { LocalAuthGuard } from './local-auth.guard';@Controller('auth')export class AuthController {constructor(private authService: AuthService) {}@Post('login')@UseGuards(LocalAuthGuard) // ensures that our LocalAuthGuard is run when this route is hitasync login(@Request() req, @Response() res) {// we will implement the logic in this function laterreturn res.status(200).json({user: req.user,});}}
At this point, we can make requests to our login function and we should get our user back in return if the credentials were correct, otherwise we should get a 401 unauthorized error.
> curl -H "Content-Type: application/json" --data '{"username":"user","password":"password"}' http://localhost:3000/auth/login
{"user":{"id":1,"username":"user"}}
> curl -H "Content-Type: application/json" --data '{"username":"not_a_user","password":"not_a_password"}' http://localhost:3000/auth/login
{"statusCode":401,"message":"Unauthorized"}
Signing and Returning a JWT
With our local strategy implemented, the next step will be to generate and sign a JWT on successful login. We can install a NestJS JWT module to do this:
> npm install --save @nestjs/jwtTo use this module, we'll have to import it in auth.module.ts:
...import { JwtModule } from '@nestjs/jwt';...@Module({imports: [UsersModule,PassportModule,JwtModule, // import the JWTModule here],...})export class AuthModule {}
To generate and sign a JWT, we will add a login method to our AuthService. This method will get called by our auth/login route handler, which will only be invoked after our Passport local strategy has successfully validated the user. The login method will first check to see if the user is nullish, in which case it will throw an error. If the user is valid, we will create a JWT with its ID, which we can use to perform a look up with on subsequent calls:
...import { JwtService } from '@nestjs/jwt'; // import the NestJS JWTService...@Injectable()export class AuthService {constructor(private usersService: UsersService,private jwtService: JwtService, // inject JWTService into AuthService) {}// validateUser will stay the sameasync validateUser(...): Promise<Omit<User, 'password'> | null> { ... }// we add this new login method that will sign and return a JWTlogin(user: Omit<User, 'password'> | null) {if (user == null) {throw new Error('Invalid User');}return {access_token: this.jwtService.sign({sub: user.id,}),};}}
That's all we have to do to get a JWT! To return the JWT on auth/login calls, update the login route handler like so:
...@Controller('auth')export class AuthController {constructor(private authService: AuthService) {}@UseGuards(LocalAuthGuard)@Post('login')async login(@Request() req, @Response() res) {try {const accessToken = this.authService.login(req.user);return res.status(200).json(accessToken);} catch (err) {return res.status(403);}}}
We can now test our auth/login route and should see an access_token returned on success:
> curl -H "Content-Type: application/json" --data '{"username":"user","password":"password"}' http://localhost:3000/auth/login
{"access_token":"eyJhbGciOiJIUzI1NiIsInR5cCI6IkpXVCJ9.eyJzdWIiOjEsImlhdCI6MTYxNzgxMjU3MSwiZXhwIjoxNjE3ODE2MTcxfQ.2vfgxvPJ0uSWkHPU0LclY43fTOzzfQKRp4INUwN17qU"}
Signing the JWT with Secrets
It is smart to use some kind of key or secret when signing JWTs in order to prevent tampering. To use the JWT library with secrets, we are going to install the NestJS config module, which will allow us to access application configurations, like environment variables, in our modules. Install the package with the following command:
> npm i --save @nestjs/configWe'll need to register it globally so that each module has the same access to it. Modify your app.module.ts file like so:
import { Module } from '@nestjs/common';import { ConfigModule } from '@nestjs/config'; // import the config moduleimport { AppController } from './app.controller';import { AppService } from './app.service';import { TodosModule } from './todos/todos.module';import { PrismaModule } from './prisma/prisma.module';import { AuthModule } from './auth/auth.module';import { UsersModule } from './users/users.module';@Module({imports: [ConfigModule.forRoot({ isGlobal: true }), // register it globallyTodosModule,PrismaModule,AuthModule,UsersModule,],controllers: [AppController],providers: [AppService],})export class AppModule {}
Next, you'll need to open up your .env file and add a new environment variable for your secret:
# Environment variables declared in this file are automatically made available to Prisma.
# See the documentation for more detail: https://pris.ly/d/prisma-schema#using-environment-variables

# Prisma supports the native connection string format for PostgreSQL, MySQL and SQLite.
# See the documentation for all the connection string options: https://pris.ly/d/connection-strings

DATABASE_URL="postgresql://<username>:<password>@localhost:5432/<database>?schema=public"
JWT_SECRET=top_secr3t
Lastly, we'll want to update our auth.module.ts file to register the secret with the JWTModule:
...import { ConfigService } from '@nestjs/config';...@Module({imports: [UsersModule,PassportModule,JwtModule.registerAsync({useFactory: async (configService: ConfigService) => ({secret: configService.get<string>('JWT_SECRET'), // get the env var we createdsignOptions: { expiresIn: 3600 }, // we can also set a TTL on JWTs}),inject: [ConfigService], // specify any services we'd like to access in the function above}),],...})export class AuthModule {}
Notice that we use async registration when importing our JWTModule now. This allows us to inject the ConfigService and use it to pass our JWT secret to the service for signing. We also added an expiration (TTL or Time to Live) value, which means our tokens are only valid for the amount of time in seconds we set expiresIn to.
Creating a JWT Passport Strategy and Guard
So far, we've create a login route that validates credentials and returns a signed JWT on success. We now need a way to parse requests that contain a JWT so that other routes can verify whether or not the user is logged in. Once again, Passport provides a strategy which will help us do this.
Let's install the passport-jwt module and its types:
> npm i --save passport-jwt && npm i --save-dev @types/passport-jwtNext, create a new class for our strategy implementation, and a guard which we'll attach to the Todo controller to prevent unauthenticated users from accessing those routes:
> nest g class jwt.strategy authOpen up auth/jwt.strategy.ts and add the following code:
import { ExtractJwt, Strategy } from 'passport-jwt';import { ConfigService } from '@nestjs/config';import { PassportStrategy } from '@nestjs/passport';import { Injectable } from '@nestjs/common';import { User } from '@prisma/client';import { UsersService } from '../users/users.service';@Injectable()export class JwtStrategy extends PassportStrategy(Strategy) {constructor(private readonly usersService: UsersService,configService: ConfigService,) {super({jwtFromRequest: ExtractJwt.fromAuthHeaderAsBearerToken(),ignoreExpiration: false,secretOrKey: configService.get<string>('JWT_SECRET'),});}validate(payload: { sub: number }): Promise<User> {return this.usersService.findOne({ id: payload.sub });}}
Notice that we inject UsersService and ConfigService into this strategy. In the constructor of this strategy, we pass a few different configurations to the super class (the resulting class of PassportStrategy(Strategy)). The first thing we do is specify where to look for the JWT with the jwtFromRequest field. In this case, we have settled on passing a bearer token, which the passport-jwt module provides an extractor for. We also set ignoreExpiration to false to ensure that we do not accept expired tokens. Finally, we tell passport to use our JWT_SECRET with the secretOrKey field, which uses the ConfigService again. This is necessary because passport needs to use the same secret that it signed with to decode the token.
Further down, we specify our validate function, which takes in the decoded token payload. We use our UsersService to look up the user with the ID we found in the token. Remember that we sign JWTs with the following payload: this.jwtService.sign({ sub: user.id }) during a successful login. The last thing to note is that the result of validate is attached to the request object as request.user. In a later section, we will use this data for authorization.
Register this new strategy in auth/auth.module.ts like so:
...import { JwtStrategy } from './jwt.strategy';@Module({...providers: [AuthService,LocalStrategy,JwtStrategy, // register our JWTStrategy provider],...})export class AuthModule {}
Building and Attaching a JWT Guard
The last thing we'll need to do is implement a JWTAuthGuard using the NestJS AuthGuard module, like we did for the local strategy. Create a new guard called jwt-auth:
> nest g guard jwt-auth authGo ahead and open the guard you created (auth/jwt-auth.guard.ts). The code will be incredibly simple since we've already done all of the heavy lifting in our strategy implementation above. All that we need to do is specify which strategy to use (jwt):
import { Injectable } from '@nestjs/common';import { AuthGuard } from '@nestjs/passport';@Injectable()export class JwtAuthGuard extends AuthGuard('jwt') {}
We can now use this guard on any routes that require authentication to access. In our application, all of the todos routes will need a JWT to work. Let's add the JWTAuthGuard to our Todos controller. We can attach the guard to all exposed routes by adding the @UseGuards(...) decorator to the controller (controller-scoped) instead of a route (method-scoped):
...import { JwtAuthGuard } from '../auth/jwt-auth.guard';...@Controller('todos')@UseGuards(JwtAuthGuard)export class TodosController {...}
Let's test this by hitting a todos route with and without an access token:
> curl http://localhost:3000/todos
{"statusCode":401,"message":"Unauthorized"}
> curl -H "Content-Type: application/json" --data '{"username":"user","password":"password"}' http://localhost:3000/auth/login
{"access_token":"<TOKEN>"}
curl -H "Authorization: Bearer <TOKEN>" http://localhost:3000/todos
[]
Beautiful! The routes work when we pass a valid JWT, but give us auth errors when we don't. If you start trying other todos routes, like the create route, you might notice that they don't quite work as expected because the route handlers do not yet consume the user's data.
Updating Todos Logic to Work with a User
As of now, we have authentication through our login and JWT strategies, but we have some issues with our Todos module. We need to update todos/todos.service.ts and todos/todos.controller.ts to perform all actions with respect to the requesting user. Since all routes in our Todos module require a valid JWT and have looked up the user and attached it to the request object, we simply need to consume it in our route handlers.
Building a User Decorator
I mentioned in the last section that Passport will attach the user we returned from the validate method in our JWT strategy to the request object. This means that every request that uses the JWT guard should have access to the user. To make life easy, we can build a decorator to pull the user off of the request object and access it as a parameter in our route handler methods. If you are interested in learning more about decorators, check out my last post.
NestJS has a command for creating decorators that we can use for this task:
> nest g decorator users usersOpen up users/users.decorator.ts and add the following code:
import { createParamDecorator, ExecutionContext } from '@nestjs/common';export const User = createParamDecorator((data: unknown, ctx: ExecutionContext) => {const request = ctx.switchToHttp().getRequest();return request.user;},);
In the snippet above, we export a User decorator that uses the context argument provided by NestJS to access the HTTP request and returns the user object from it.
Since todos are owned by users, we will need to use this decorator when creating a new todo. We also need to be aware of the user when fetching all todos so that we can filter for only the ones that they own. Throw the User decorator into the Todos controller like so:
...import { Prisma, User as UserModel } from '@prisma/client';...import { User } from '../users/users.decorator';...@Controller('todos')export class TodosController {...@Post()create(@User() user: UserModel, @Body() todo: Prisma.TodoCreateInput) {return this.todosService.create(user.id, todo);}@Get()findAll(@User() user: UserModel) {return this.todosService.findAll(user.id);}
Finally, we'll have to update TodosService to take in the user. This should be fairly straight forward since Prisma allows us to easily connect related database records:
@Injectable()export class TodosService {...create(userId: number, todo: Prisma.TodoCreateInput) {return this.prisma.todo.create({data: {...todo,user: {connect: {id: userId,},},},});}findAll(userId: number) {return this.prisma.todo.findMany({where: {userId,},});}...}
With this fixed, we can create user-scoped todos. Additionally, when getting all todos, we will only get the ones that the requesting user owns. In the next section, we will implement authorization to ensure that a user can only get, edit, or delete their own todos.
Adding Authorization
The last step in our journey is to ensure that a user can only get or modify their own todos. In the findAll and create route handlers that we modified in the last section, we are able to consume the user's ID from the JWT to ensure that our application will only ever perform these operations in the context of the requesting user. This works because those requests are not scoped to a single existing todo object, and we have confidence that the user is who they say they are because of the JWT verification process. Since the remaining routes are in fact scoped to a single todo object (indicated by the id param), we need to know whether or not the requesting user owns the todo before the route handler executes. To do this, we could simply pull our user out of the request and pass it to a where clause in our queries, like in the last section. The problem with this approach is that it leads to a scenario where our response isn't entirely correct anymore. With this approach, we will return null when a user doesn't own the todo they are interacting with when we should really return an authorization error since the todo does exist, but it's owned by a different user. To accomplish the correct behavior, we need to look up the todo using the ID from the request parameter and then check if it is owned by the user. We can easily do this with a new guard:
> nest g guard todos todosThis guard will take in the TodosService, get the user, which has already been verified by our JWTGuard, check for a todo ID parameter, and then perform a query and ownership check using the ID. Our code will look like the following:
import { Injectable, CanActivate, ExecutionContext } from '@nestjs/common';import { TodosService } from './todos.service';@Injectable()export abstract class TodosGuard implements CanActivate {constructor(private readonly todosService: TodosService) {}async canActivate(context: ExecutionContext): Promise<boolean> {const req = context.switchToHttp().getRequest();const { params, user } = req;if (params?.id == null) {return true; // this request isn't scoped to a single existing todo}const todo = await this.todosService.findOne(+params?.id);return todo.userId === user.id;}}
The important line in this guard is return todo.userId === user.id;, which checks whether or not the user owns the todo. We can attach this guard to all routes in our Todos controller like so:
...import { TodosGuard } from './todos.guard';...@Controller('todos')@UseGuards(TodosGuard) // add our TodosGuard@UseGuards(JwtAuthGuard) // keep this lowest so that it gets executed first!export class TodosController {...}
With this last piece in place, we will get authorization errors if we try to interact with an existing todo that is not owned by the requesting user. This is a very simple form of authorization that we would need to expand upon in more sophisticated applications.
Future Authorization Considerations
The solution we have built works to authenticate a user and authorize access to their own todos. In reality, we might have several different types of resources that we would need to gate with a similar authorization scheme. Additionally, we might have different user roles that we need to accommodate for, such as administrators that should be able to access all todos.
My initial approach to this application solved the general resource authorization problem by creating a resource guard in the auth directory. This guard took in a generic service argument that implemented a basic CRUD interface and returned a Resource type, which corresponded to a union type of every different user-scoped resource defined by the application. The guard looked something like this:
import { Injectable, CanActivate, ExecutionContext } from '@nestjs/common';import { Resource, userIsAuthorizedToAccess } from './authorization-policies';import { Role } from './role.enum';interface GenericCRUDService {findOne(id: number): Promise<Resource>;}@Injectable()export abstract class ResourceGuard<T extends GenericCRUDService>implements CanActivate {constructor(private readonly service: T) {}async canActivate(context: ExecutionContext): Promise<boolean> {const req = context.switchToHttp().getRequest();const { params, user } = req;if (params?.id == null) {return true;}const resource = await this.service.findOne(+params?.id);return userIsAuthorizedToAccess(user, Role.User, resource);}}
The bulk of the authorization logic then gets shifted off to userIsAuthorizedToAccess, which is responsible for performing the entity-specific ownership and role checks on that resource and user. I encourage you to try to implement logic like this to see how easy to use it becomes!
With this pattern, any time you create a new user-scoped resource, we can simply throw a new subclassed resource guard into that module directory like so:
import { Injectable } from '@nestjs/common';import { ResourceGuard } from '../auth/resource.guard';import { TodosService } from './todos.service';@Injectable()export class TodoGuard extends ResourceGuard<TodosService> {constructor(todosService: TodosService) {super(todosService);}}
Testing
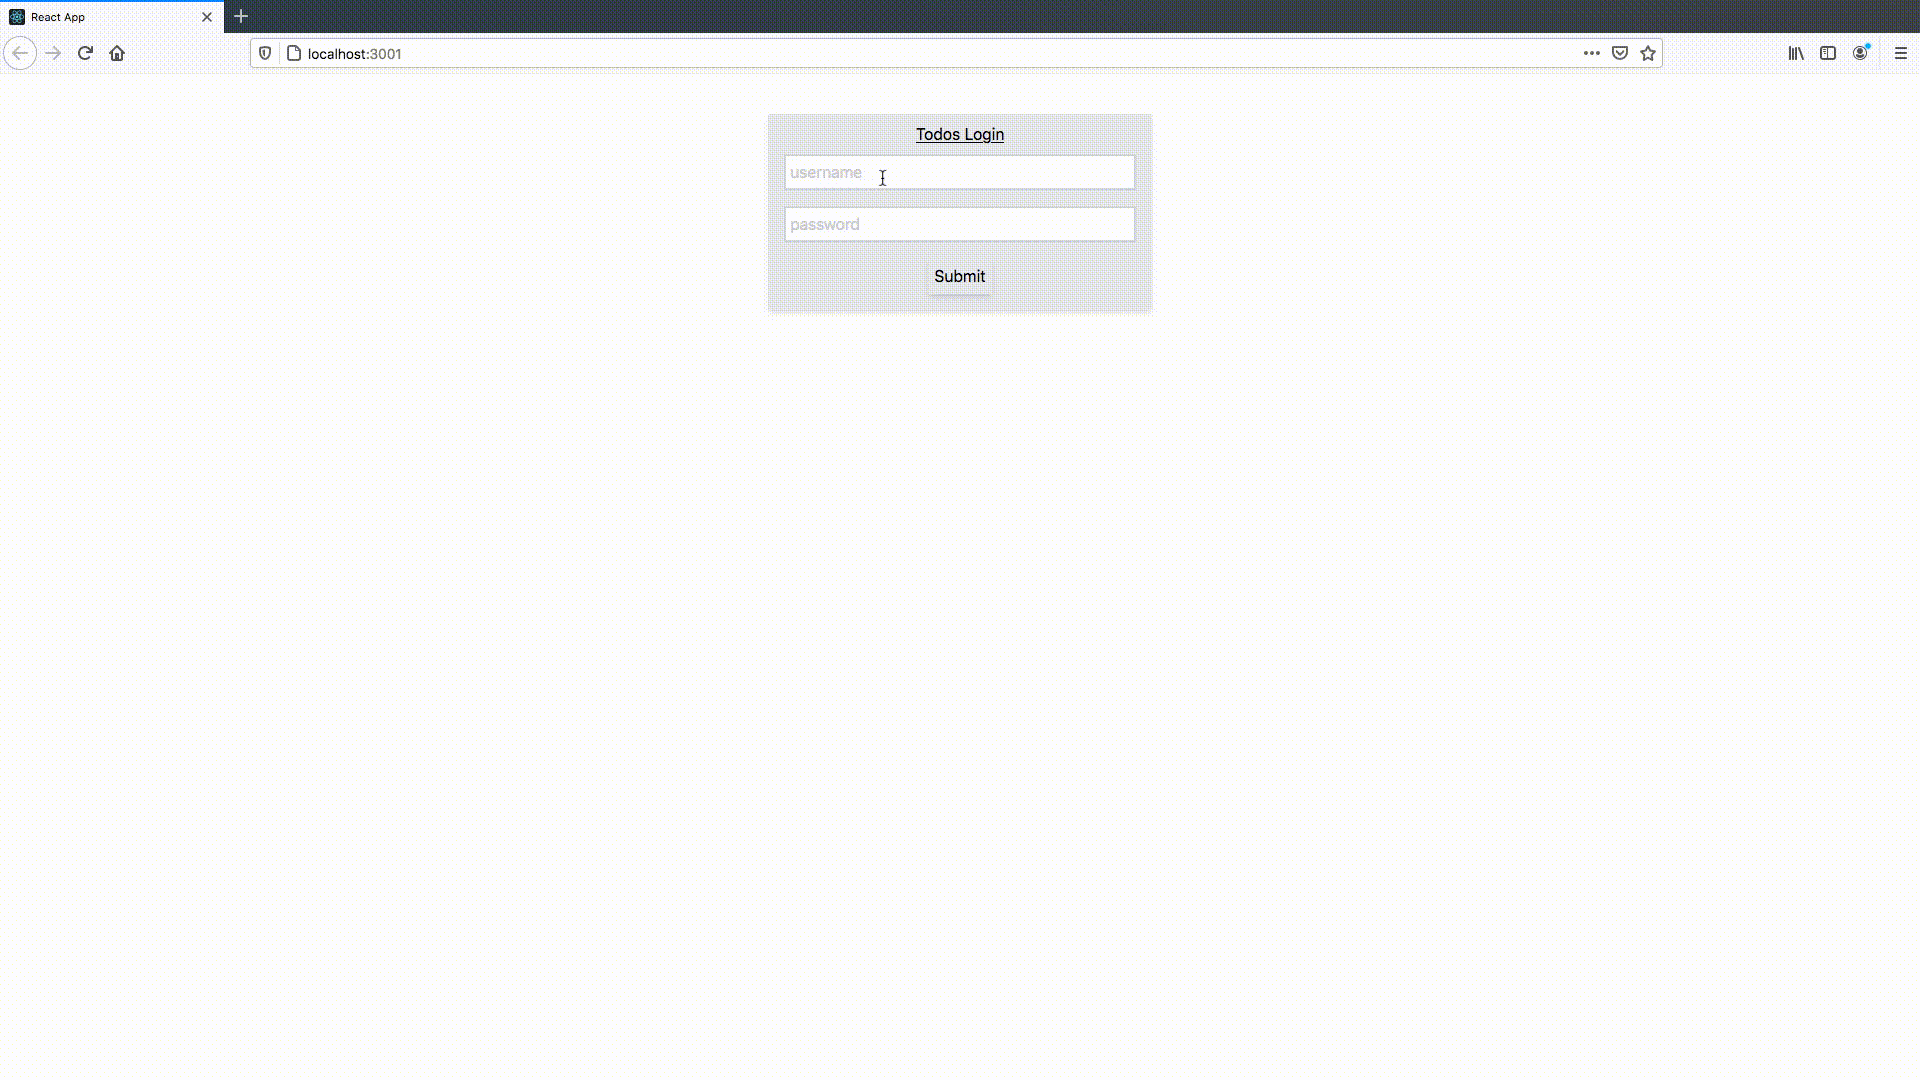
We can test our updated todo application using the React client.
I created two users for testing this. In the GIF below, I demonstrate that either user can login, see, and interact with only their own todos, making our application useful for more than one person:
Conclusion
This marks the end of my exploration of NestJS for now. Overall, I've really enjoyed using NestJS - it combines pieces of Express that I like, but adds opinion, structure and design choices that I can live with. More importantly, it has a reliable set of developer tools and solid documentation, both of which are major wins in my book. There are also pieces of NestJS that I haven't touched, but look incredibly promising and provide solutions for underserved areas, like web-socket and micro-service / gRPC-based service architecture support.
I learned how to program using Java and was amazed when I tried Node.js for the first time; it felt so simple and flexible. The freedom to write code without consideration towards static-typing, abstractions, or structure eventually incurs a cost, though. Having worked on several production Express applications, I've experienced the growing pains of an unbounded Node.js codebase that lacks useful abstractions. There are pieces of NestJS that I don't necessarily agree with (not sold on how heavily decorators are used in a language that doesn't have support for them yet, for example), but I feel strongly that it outsources the right amount of design for developers to feel productive and provides off-the-shelf solutions for maintainable code. With all of this being said, NestJS is quite high-touch. There is undoubtedely a cost to learning how to leverage such a framework effectively that might not mesh well with the decision to reach for Node.js in the first place.
With the knowledge required to get up and running quickly, I will be using NestJS on new projects that require more than one set of domain-specific endpoints going forward. That fact that it does so many things well out-of-the-box seems too good to pass up.
Stay tuned for my next post where I will explore Deno!